Introduction
The symfony framework has been an Open-Source project for more than three years and has become one of the most popular PHP frameworks thanks to its great features and great documentation. And this grand tradition started early on.
In December 2005, just after the first official release of symfony, we published the "Askeet tutorial", a set of 24 tutorials, published day-by-day between December 1st and Christmas.
This tutorial has proven to be an invaluable tool to promote the framework to newcomers. A lot of developers learned symfony thanks to askeet, and many companies still use askeet as their main training material.
We are now celebrating the release of symfony 1.2 and the askeet tutorial starts to show its age. So, it's time for another fresh tutorial.
Enter Jobeet, the 2008 advent calendar tutorial!
The Challenge
That's right, we will do it again. Every day including week-ends, a new tutorial will be published. Each tutorial is meant to last about one hour, and will be the occasion to learn symfony by coding a real website, from start to finish.
One hour times twenty-four equals a day, and that's exactly how long we think that a developer needs to learn the fundamentals of symfony. Every day, new features will be added to the application, and we'll take advantage of this development to introduce you to new symfony functionalities as well as good practices in symfony web development.
For askeet, the 21st day was the "get-a-symfony-guru-for-a-day". We had no plan, and the community had to propose a feature to add to askeet. It was a great success and the community decided that we needed a search engine to the application. And we did it. The 21st day tutorial also proved to be one of the most popular of the askeet tutorials.
For Jobeet, we will celebrate the winter on the 21st with a "design day". After day 4, you will have all the needed HTML and CSS information to start designing the Jobeet public website. So, if you work with a designer, or if your company has a design department, you will be able to contribute a design. On the 21st, we will organize a poll and the community will have to choose the default design that will be bundled with Jobeet. You will of course receive credits and all the fame associated with it!
This Tutorial is different
Remember the early days of PHP4. Ah, la Belle Epoque! PHP was one of the first languages dedicated to the web and one of the easiest to learn.
But as web technologies evolve at a very fast pace, web developers need to keep up with the latest best practices and tools. The best way to learn is of course by reading blogs, tutorials, and books. We have read a lot of these, be they written for PHP, Python, Java, Ruby, or Perl, and many of them fall short when the author starts giving snippets of codes as examples.
You are probably used to reading warnings like:
"For a real application, don't forget to add validation and proper error handling."
or
"Security is left as an exercise to the reader."
or
"You will of course need to write tests."
What? These things are serious business. They are perhaps the most important part of any piece of code. And as a reader, you are left alone. Without these concerns taken into account, the examples are much less useful. You cannot use them as a good starting point. That's bad! Why? Because security, validation, error handling, and tests, just to name a few, take care to code right.
In this tutorial, you will never see statements like those as we will write tests, error handling, validation code, and be sure we develop a secure application. That's because symfony is about code, but also about best practices and how to develop professional applications for the enterprise. We will be able to afford this luxury because symfony provides all the tools needed to code these aspects easily without writing too much code.
Validation, error handling, security, and tests are first-class citizens in symfony, so it won't take us too long to explain. This is just one of many reasons why to use a framework for "real life" projects.
All the code you will read in this tutorial is code you could use for a real project. We encourage you to copy and paste snippets of code or steal whole chunks.
The Project
The application to be designed could have been yet another blog engine. But we want to use symfony on a useful project. The goal is to demonstrate that symfony can be used to develop professional applications with style and little effort.
We will keep the content of the project secret for another day as we already have much to do today. However, you already know the name of the application: Jobeet.
What for Today?
As 24 hours is plenty of time to develop an application with symfony, we won't write PHP code today. But even without writing a single line of code, you will start understanding the benefits of using a framework like symfony, just by bootstrapping a new project.
The objective of the day is to setup the development environment and display a page of the application in a web browser. This includes installation of symfony, creation of an application, and web server configuration.
Prerequisites
First of all, check that you already have a working web development environment with a web server (Apache for example), a database engine (MySQL, PostgreSQL, or SQLite), and PHP 5.2.4 or later.
As we will use the command line a lot, it's better to use a Unix-like OS,
but if you run a Windows system, it will also work fine, you'll just have to
type a few commands in the cmd prompt.
Unix shell commands can come in handy in a Windows environment. If you would like to use tools like
tar,gzip, orgrepon Windows you can install Cygwin. The official docs are a little sparse, so a good installation guide can be found here. The adventurous may also like to try Microsoft's Windows Services for Unix.
As this tutorial will mostly focus on the symfony framework, we will assume that you already have a solid knowledge of PHP 5 and Object Oriented programming.
Symfony Installation
First, create a directory to host the files related to the Jobeet project:
$ mkdir -p /home/sfprojects/jobeet
$ cd /home/sfprojects/jobeet
On Windows:
c:\> mkdir c:\development\sfprojects\jobeet
c:\> cd c:\development\sfprojects\jobeet
Windows users are advised to run symfony and to setup their new project in a path which contains no spaces. Avoid using the
Documents and Settingsdirectory, including anywhere underMy Documents.
Create a directory to host the symfony framework library files:
$ mkdir -p lib/vendor
To install symfony, download the archive package found on the symfony website. As this tutorial has been written for symfony 1.2, download the latest version available for this version.
Under the "Source Download" section, you will find the archive in the .tgz
format or in the .zip format. Download the archive and put it under the
freshly created lib/vendor directory and un-archive it:
$ cd lib/vendor
$ tar zxpf symfony-1.2-latest.tgz
$ mv symfony-1.2.0 symfony
Under Windows unzipping the zip file can be done with the explorer. After you
renamed the directory to symfony, there should be a directory named
c:\development\sfprojects\jobeet\lib\vendor\symfony.
As PHP configurations vary a lot from a distribution to another, we need to check that your PHP configuration meets the symfony minimum requirements. Launch the configuration checker script provided with symfony from the command line:
$ cd ../..
$ php lib/vendor/symfony/data/bin/check_configuration.php
If there is a problem, the output will give you hints on how to fix it. You should also execute the checker from a browser as PHP configuration can be different. Copy the file somewhere under the web server root directory and access the file. Don't forget to remove the file from the web root directory afterwards.
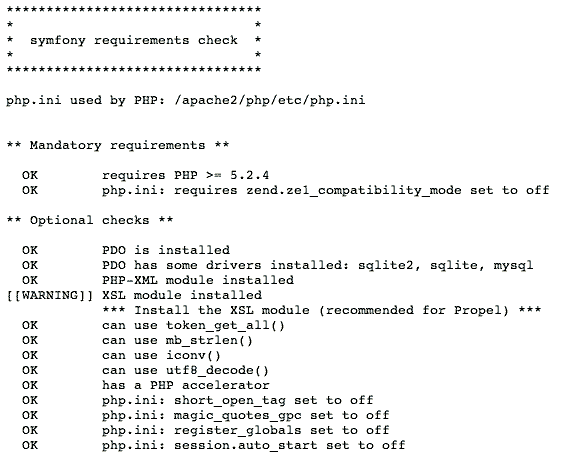
If the script does not output any error, check that symfony is correctly
installed by using the symfony command line to display the version (note the
capital V):
$ php lib/vendor/symfony/data/bin/symfony -V
On Windows:
c:\> cd ..\..
c:\> php lib\vendor\symfony\data\bin\symfony -V
If you are curious about what this command line tool can do for you, type
symfony to list the available options and tasks:
$ php lib/vendor/symfony/data/bin/symfony
On Windows:
c:\> php lib\vendor\symfony\data\bin\symfony
The symfony command line is the developer best friend. It provides a lot of utilities that improve your productivity for day-to-day activities like cleaning the cache, generating code, and much more.
Project Setup
In symfony, applications sharing the same data model are regrouped into projects. For the Jobeet project, we will have two different applications: a frontend and a backend.
Project Creation
From the jobeet directory, run the symfony generate:project task to
actually create the symfony project:
$ php lib/vendor/symfony/data/bin/symfony generate:project jobeet
On Windows:
c:\> php lib\vendor\symfony\data\bin\symfony generate:project jobeet
The generate:project task generates the default structure of directories
and files needed for a symfony project:
| Directory | Description |
|---|---|
| apps/ | Hosts all project applications |
| cache/ | The files cached by the framework |
| config/ | The project configuration files |
| lib/ | The project libraries and classes |
| log/ | The framework log files |
| plugins/ | The installed plugins |
| test/ | The unit and functional test files |
| web/ | The web root directory (see below) |
Why does symfony generate so many files? One of the main benefits of using a full-stack framework is to standardize your developments. Thanks to symfony default structure of files and directories, any developer with some symfony knowledge can take over the maintenance of any symfony project. In a matter of minutes, he will be able to dive into the code, fix bugs, and add new features.
The generate:project task has also created a symfony shortcut in the
Jobeet project root directory to shorten the number of characters you have to
write when running a task.
So, from now on, instead of using the fully qualified path to the symfony
program, we will use the symfony shortcut.
Application Creation
Now, create the frontend application by running the generate:app task:
$ php symfony generate:app --escaping-strategy=on --csrf-secret=Unique$ecret frontend
As the symfony file is executable, Unix users can replace all occurrences of 'php symfony' by './symfony' from now on.
On Windows you can copy the 'symfony.bat' file to your project and use 'symfony' instead of 'php symfony':
c:\> copy lib\vendor\symfony\data\bin\symfony.bat .
Once again, the generate:app task creates the default directory structure
needed for an application under the apps/frontend directory:
| Directory | Description |
|---|---|
| config/ | The application configuration files |
| lib/ | The application libraries and classes |
| modules/ | The application code (MVC) |
| templates/ | The global template files |
All
symfonycommands must be run in the project root directory unless explicitly said otherwise.
When calling the generate:app task, we have also passed two security related
options:
--escaping-strategy: Enables output escaping to prevent XSS attacks--csrf-secret: Enables session tokens in forms to prevent CSRF attacks
By passing these two optional options to the task, we have secured our future development from the two most widespread vulnerabilities found on the web. That's right, symfony will automatically take security measures on our behalf.
If you know nothing about XSS or CSRF, take the time to learn more these security vulnerabilities.
The symfony Path
You can get the symfony version used by your project by typing:
$ php symfony -V
The -V option also displays the path to the symfony installation directory,
which is to be found in config/ProjectConfiguration.class.php:
// config/ProjectConfiguration.class.php
require_once '/Users/fabien/work/symfony/dev/1.2/lib/autoload/sfCoreAutoload.class.php';
For better portability, change the absolute path to the symfony installation to a relative one:
// config/ProjectConfiguration.class.php
require_once dirname(__FILE__).'/../lib/vendor/symfony/lib/autoload/sfCoreAutoload.class.php';
That way, you can move the Jobeet project directory anywhere on your machine or another one, and it will just work.
The Environments
If you have a look at the web/ directory, you will find two PHP files:
index.php and frontend_dev.php. These files are called front
controllers: all requests to the application are made through them. But why
do we have two front controllers as we have only defined one application?
Both files point to the same application but for different environments. When you develop an application, except if you develop directly on the production server, you need several environments:
- The development environment: This is the environment used by web developers to add new features, fix bugs, ...
- The test environment: This environment is used to automatically test the application.
- The staging environment: This environment is used by the customer to test the application and report bugs or missing features.
- The production environment: This is the environment an end user interacts with.
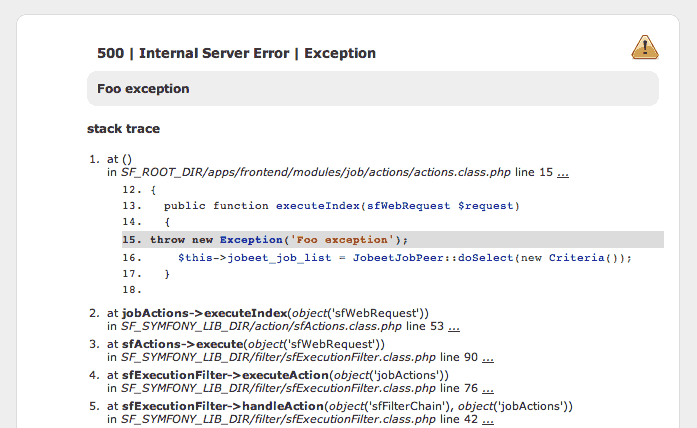
What makes an environment unique? In the development environment, the application needs to log all the details of a request to ease the debugging, it must display exception in the browser, but the cache system must be disabled as all changes made to the code must be taken into account right away. So, the development environment must be optimized for the developer:
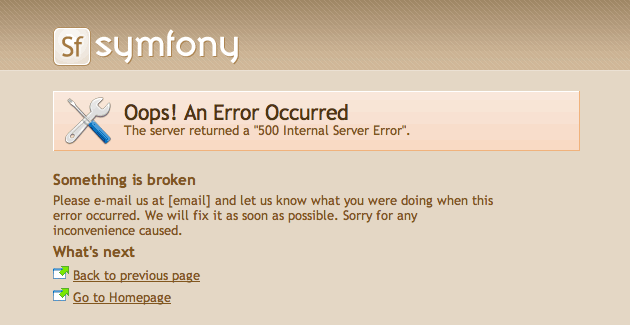
But on the production environment, the application must display customized error messages instead of raw exceptions, and of course, the cache layer must be activated. So, the production environment must be optimized for performance and the user experience.
A symfony environment is a unique set of configuration settings and symfony
comes bundled with three of them: dev, test, and prod.
If you open the front controller files, you will see that the only difference is the environment setting:
// web/index.php
<?php

require_once(dirname(__FILE__).'/../config/ProjectConfiguration.class.php');

$configuration = ProjectConfiguration::getApplicationConfiguration('frontend', 'prod', false);
sfContext::createInstance($configuration)->dispatch();
Defining a new symfony environment is as simple as creating a new front controller. We will see later on how to change the settings for an environment.
Web Server Setup: The ugly Way
In the previous section, a directory has been created to host the Jobeet project. If you have created it somewhere under the web root directory of your web server, you can already access the project in a web browser.
Of course, as there is no configuration, if it is very fast to set up, but try
to access the config/databases.yml file in your browser to understand the
bad consequences of such a laziness attitude.
Never ever use this setup on a production server and read the next section to learn how to configure your web server properly.
Web Server Setup: The secure Way
A good web practice is to put under the web root directory only the files
that need to be accessed by a web browser like stylesheets, JavaScripts, or
images. And by default, we recommend to store these files under the web
sub-directory of a symfony project.
If you have a look at this directory, you will find some sub-directories for web assets and the two front controller files. The front controllers are the only PHP files that need to be under the web root directory. All other PHP files can be hidden from the browser, which is a good idea as far as security is concerned.
Web Server Configuration
Now it is time to change your Apache configuration to make the new project accessible to the world.
Locate and open the httpd.conf configuration file and add the following
configuration at the end:
# Be sure to only have this line once in your configuration
NameVirtualHost 127.0.0.1:8080

# This is the configuration for Jobeet
Listen 127.0.0.1:8080

<VirtualHost 127.0.0.1:8080>
  DocumentRoot "/home/sfprojects/jobeet/web"
  DirectoryIndex index.php
  <Directory "/home/sfprojects/jobeet/web">
    AllowOverride All
    Allow from All
  </Directory>

  Alias /sf /usr/local/symfony/data/web/sf
  <Directory "/usr/local/symfony/data/web/sf">
    AllowOverride All
    Allow from All
  </Directory>
</VirtualHost>
The
/sfalias gives you access to images and javascript files needed to properly display default symfony pages and the web debug toolbar.On Windows, you need to replace the
Aliasline with something like:Alias /sf "c:\development\symfony\data\web\sf"
/home/sfprojects/jobeet/webshould be replaced with:c:\development\sfprojects\jobeet\web
This configuration makes Apache listen to port 8080 on your machine, so
the Jobeet website will be accessible at the following URL:
http://localhost:8080/
You can change 8080 by any number but prefer numbers greater than 1024 as
they do not require administrator rights.
Configure a dedicated Domain Name for Jobeet
If you are an administrator on your machine, it is better to setup virtual hosts instead of adding a new port each time you start a new project. Instead of choosing a port and add a
Listenstatement, choose a domain name and add aServerNamestatement:# This is the configuration for Jobeet <VirtualHost 127.0.0.1:80> ServerName jobeet.localhost <!-- same configuration as before --> </VirtualHost>The domain name
jobeet.localhosthas to be declared locally. If you run a Linux system, it has to be done in the/etc/hostsfile. If you run Windows XP, this file is located in theC:\WINDOWS\system32\drivers\etc\directory.Add in the following line:
127.0.0.1 jobeet.localhost
Test the New Configuration
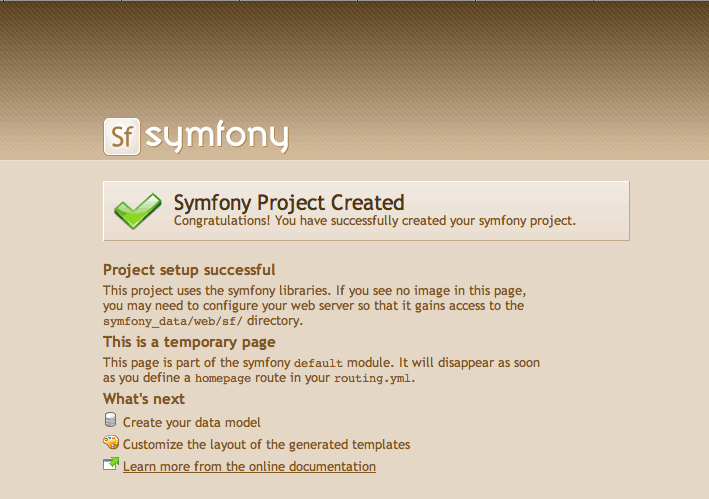
Restart Apache, and check that you now have access to the new application by
opening a browser and typing http://localhost:8080/index.php/, or
http://jobeet.localhost/index.php/ depending on the Apache configuration you
chose in the previous section.
If you have the Apache
mod_rewritemodule installed, you can remove the /index.php/ part of all the URLs.
You should also try to access the application in the development environment. Type in the following URL:
http://jobeet.localhost/frontend_dev.php/
The web debug toolbar should show on the top right corner, including small
icons proving that your sf/ alias configuration is correct.
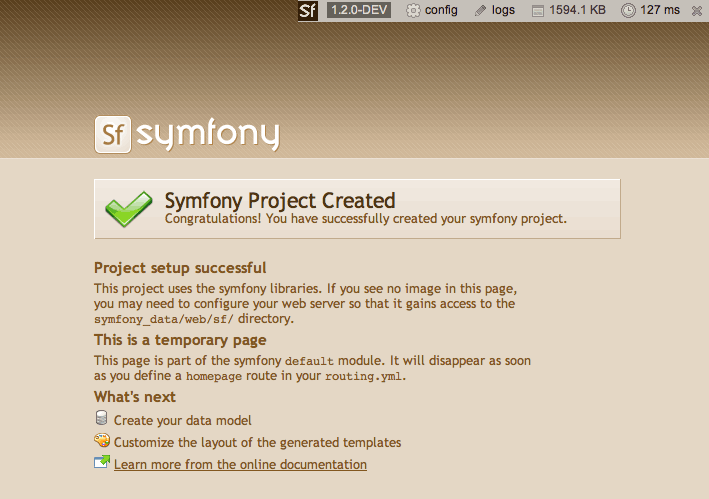
The setup is a little different if you want to run symfony on an IIS server in a Windows environment. Find how to configure it in the related tutorial.
Subversion
It is a good practice to use source version control when developing a web application. Using a source version control allows us to:
- work with confidence
- revert to a previous version if a change breaks something
- allow more than one person to work efficiently on the project
- have access to all the successive versions of the application
In this section, we will describe how to use Subversion with symfony. If you use another source code control tool, it must be quite easy to adapt what we describe for Subversion.
We assume you have already access to a Subversion server.
If you don't have a Subversion server at your disposal, you can create one for free on Google Code or just type "free subversion repository" in Google to have a lot more options.
First, create a new repository for the jobeet project:
$ svnadmin create http://svn.example.com/jobeet
$ svn mkdir -m "created default directory structure" http://svn.example.com/jobeet/trunk http://svn.example.com/jobeet/tags http://svn.example.com/jobeet/branches
Then, remove the content of the cache/ and log/ directories as we don't
want to put them into the repository.
$ cd /home/sfprojects/jobeet
$ rm -rf cache/*
$ rm -rf log/*
Now, make sure to set the write permissions on the cache and logs directories to the appropriate levels so that your web server can write to them:
$ chmod 777 cache
$ chmod 777 log
Next, do the first import:
$ svn import -m "made the initial import" . http://svn.example.com/jobeet/trunk
As we will never want to commit files located in the cache/ and /log
directories, you need to specify an ignore list:
$ svn propedit svn:ignore cache
The default text editor configured for SVN should launch. Subversion must ignore all the content of this directory:
*
Save and quit. You're done.
Repeat the procedure for the log/ directory:
$ svn propedit svn:ignore log
And enter:
*
Finally, commit these changes to the repository:
$ svn commit -m "added cache/ and log/ content in the ignore list"
Windows users can use the great TortoiseSVN client to manage their subversion repository.
The Jobeet SVN repository will be made public day by day.
So, even if the whole repository is not yet public (
http://svn.jobeet.org/), today's code has been committed and tagged.You can checkout
release_day_01:$ svn co http://svn.jobeet.org/tags/release_day_01/ jobeet/
See you Tomorrow
Well, time is over for today! Even if we have not yet started talking about symfony, we have setup a solid development environment, we have talked about web development best practices, and we are ready to start coding.
Tomorrow, we will reveal what the application will do and start diving into symfony. In between, if you want to keep in touch with the latest Jobeet news, don't forget to subscribe to the symfony blog feed.
Make sure to come back tomorrow!
Congrats on this muscled-up tuto project for brand-new 1.2 version !-) Just came across 2 typos in the svn part :
http://svn.jobeet.org is asking for username/password
@Ariel Arjona: That's normal. Only the tags for the published days are available for now. The main SVN repository will be public on day 24.
I get this error when I run this command, "php lib/vendor/symfony/data/bin/symfony -V". Ive tried it like 3x now and same thing everytime.
Parse error: syntax error, unexpected T_OBJECT_OPERATOR in /home/
@Miles Johnson: Looks like your are using PHP 4! Try to run php -v...
Good idea to make a new tutorial. I'm a Symfony1.0.x user for almost two years now. One of my latest projects is developed with Symfony1.1.x. With this tutorial I will tryout 1.2 and at the same time rehearse the basics.
Good tutorial!
But shouldn't you indicate how to restart enable the site an reload the server : a2ensite jobeet /etc/init.d/apache2 reload
And don't you think the alias /sf in the virtual host should look like this :
Alias /sf /home/sfprojects/jobeet/lib/vendor/symfony/data/web/sf <Directory "/home/sfprojects/jobeet/lib/vendor/symfony/data/web/sf">
instead of /usr/local/symfony/data/web/sf?
Greetings
Hi,
Let me start by saying that this 1.2 jobeet tutorial is a great idea and it's sure will help the transition to 1.2!
I was reading through day 1 and I saw you installed symfony in the lid/vendor folder.
But when you setup apache, you make the /sf alias to point to some other place. This place is probably the place pear installed symfony and for people using pear, that's probably the way to go. But I think for the consistency of this tutorial, it would be nice to setup everything relative to that lib/vender folder.
So I guess the apache alias directive should be changed.
This is just a suggestion and I think it would also help new comer to have it right too.
Thanks
cricri is right, you need to pouint the alias to the directory, you copied the symfony source into.
I'm very happy to see this tutorial picked up.
Under "Web Server Setup: The ugly Way", the second paragraph, it says "if it is very fast to set up". Presumably this should be "it is very fast to set up" (no "if").
I don't really see the advantage to setting up domain names, and I dislike encouraging Windows users to edit system files. Instead, I use aliases for everything (no VirtualHosts at all). This requires changing the RewriteBase in the .htaccess file, but at least the changes are now confined to Apache and the web site configuration.
Thanks!!! Migrate to symfony 1.2 :)
@Fabien - No im using PHP 5.2.6
When ever I try
svnadmin create http://...
It says "is a URL should be a path"
I trying to run the command inside my directory with the whole project "/cygdrive/d/development/sfprojects/jobeet"
(using cygwin under Vista)
Martin, That might best be asked in the forums or reported as a bug in Trac. But the quick answer is to set up a Subversion repository directory (e.g. mkdir /cygdrive/d/svnrepository) and then use svnadmin create /cygdrive/d/svnrepository/jobeet. This will only work with the Cygwin version of Subversion. If you're using the Windows version of Subversion, you'll need a Windows path, e.g. svnadmin create 'd:/svnrepository/jobeet'. (Yes, Windows will accept forward slashes just fine, and it's easier than having to escape the backslashes.)
If you have some problems with your PHP configuration, you can launch the check_configuration.php script provided with symfony:
php lib/vendor/symfony/data/bin/check_configuration.php
Just came across this tutorial... Great work...
But bumped into a problem: When I want to generate my project, it tells me that I must be in a symfony project directory.
Tried to find a solution but couldn't. Any help would be nice?
When I try to check in the symfony lib, I get an "inconsistent newlines" error, in sfDoctrinePlugin. Also phing. Also frontend_dev.php.
Fixable, but less than ideal.